If your car AC isn't cold, the problem is usually one of two things: low refrigerant from a slow leak, or restricted airflow somewhere in the system. Compressor failures and electrical faults show up less often but cause the same symptom, so a few quick checks can point you in the right direction before you spend a dime.
Run these three checks right now:
- Set the system to max cool, recirculation on, and blower on high. Weak or lukewarm air even on high suggests airflow or refrigerant trouble, not just a settings mistake.
- Pop the hood and watch the compressor clutch (the pulley at the front of the compressor) while the AC is running. It should engage with a visible click. No movement often points to low refrigerant, a blown fuse, or a failed pressure switch.
- Check the cabin air filter and feel the vents for weak airflow. A clogged filter can gut your airflow without touching the refrigerant side at all.
Pro Tip: Never vent refrigerant into the air to "test" a leak. It's both illegal in most jurisdictions and useless as a diagnostic. If you smell a sweet chemical odour or hear grinding from under the hood, shut the AC off and stop troubleshooting yourself.
Key Takeaways
Most warm car AC problems trace to a refrigerant leak or an airflow restriction, and a few driveway checks usually tell you which one you're facing before you call a shop.
| Point | Details |
|---|---|
| Run the free checks first | Confirm settings, inspect the cabin filter, and watch the compressor clutch before assuming a costly fault. |
| Match symptoms to causes | Warm at idle but cool at speed points to condenser airflow; one-side cold points to a blend door actuator. |
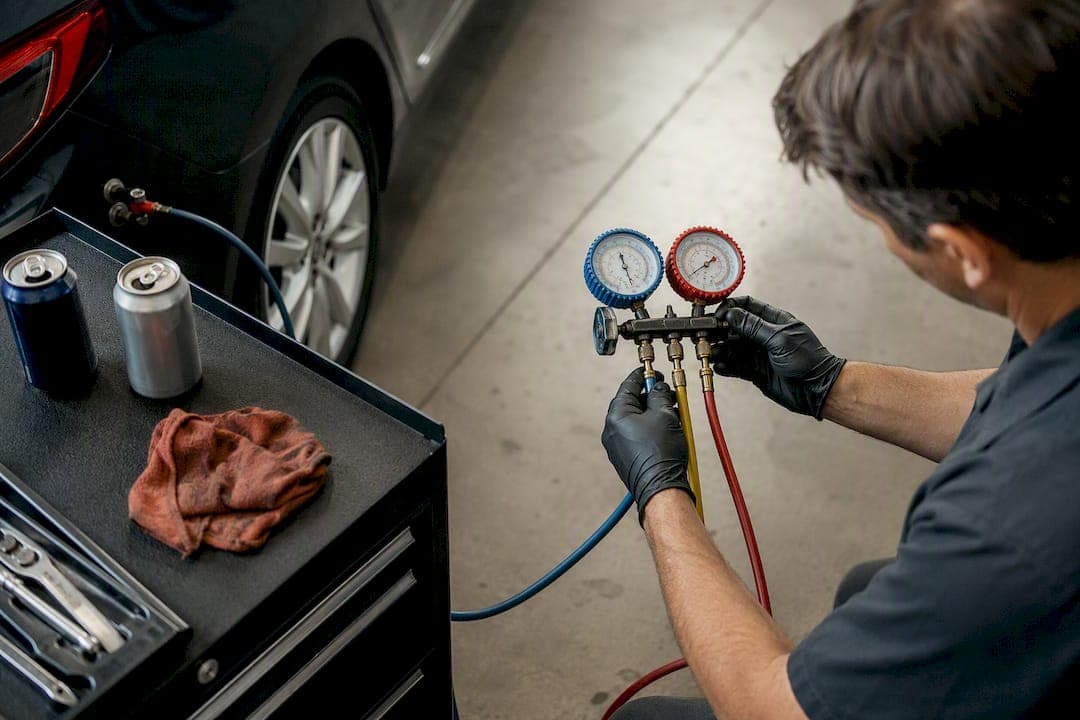
| Leave refrigerant work to a shop | Manifold gauge tests and UV dye leak checks require equipment and certification a DIY can't replace. |
| Skip the recharge can | Stop-leak products and DIY cans commonly contaminate the system and mask leaks instead of fixing them. |
| Book through Garagemap | Compare vetted Calgary-area shops offering certified AC diagnostics and refrigerant service before you commit to a repair. |
Table of Contents
- How does car air conditioning actually make cold air?
- What causes AC to blow warm air, and what does each cause feel like?
- How do you diagnose a warm car AC step by step?
- When should you DIY versus call a technician?
- What does the evidence actually tell you to do first?
- Sources
How does car air conditioning actually make cold air?
The system works as a loop: the compressor pressurizes refrigerant gas, the condenser (mounted in front of your radiator) cools it into a liquid, an expansion device drops its pressure so it can absorb heat, and the evaporator lets it boil back into a gas inside the cabin, pulling heat out of the air your blower pushes through. Any weak link in that chain shows up as warm air at the vents.
Pressure and airflow are the two things that make or break this loop:
- Low pressure anywhere upstream (from a leak) starves the evaporator of refrigerant.
- Blocked airflow across the condenser or through the cabin filter chokes off heat exchange even if refrigerant levels are fine.
That's why symptoms like "cold at highway speed but warm at a stoplight" are so diagnostic. They point straight at airflow, not the refrigerant charge itself.
What causes AC to blow warm air, and what does each cause feel like?
Matching your symptoms to a likely cause saves you a lot of guesswork. Here's how the most common failures typically present:
- Low refrigerant or a leak. A slow fade in cooling over weeks usually means a small leak at an O-ring or fitting. Sudden total loss of cold air points to a bigger failure, like a cracked line or a blown seal. Depleted refrigerant is one of the most common reasons for poor cooling, and leaks typically show up at fittings, O-rings, the condenser, evaporator, or compressor shaft seal.
- Compressor or clutch failure. No clutch engagement, a loud grinding noise, or a compressor that won't spin at all suggests internal damage. A seized compressor is a bigger repair, since metallic debris from an internal failure can contaminate the entire system, sometimes called "black death" in the trade.
- Condenser airflow or fan problems. Cool air at speed but warm air at idle is close to a textbook sign of a fan or airflow issue, often from a failed condenser fan, blown fuse, or debris packed into the fins.
- Cabin air filter or airflow restriction. Weak airflow paired with a musty smell almost always traces back to a clogged cabin filter, which is worth ruling out before touching anything refrigerant related.
- Blend door actuator or HVAC control faults. One side of the cabin blowing cold while the other stays warm, or a dash setting that doesn't match what's coming out of the vents, usually means a stuck or broken blend door actuator.
- Electrical faults and pressure switches. A compressor that won't engage even with correct settings and full refrigerant often traces to a blown fuse, a bad relay, or a faulty low pressure cutoff switch protecting the system.
- Restricted expansion device or system contamination. Intermittent cooling with frost or ice forming on the accumulator or lines suggests a clog in the expansion device, often from moisture or debris in the system.
How do you diagnose a warm car AC step by step?
Start by logging your symptoms before opening the hood: does it happen at idle only, at highway speed only, on one side of the cabin, or all the time? That pattern alone narrows the diagnosis faster than swapping parts at random.
DIY checks you can safely run:
- Confirm the AC is set correctly (max cool, recirculation, high blower).
- Inspect and, if needed, replace the cabin air filter.
- Look at the condenser through the front grille for bent fins, bugs, or leaves blocking airflow.
- Listen and watch for the compressor clutch engaging.
- Check the AC fuses and relays against your owner's manual fuse diagram.
- Look under the car after a drive. Water dripping is normal condensation, but oily or greenish stains near fittings suggest a refrigerant or oil leak.
What needs shop tools:
| Test | What it checks |
|---|---|
| Manifold gauge pressure test | Confirms refrigerant charge and reveals pressure patterns for leaks, compressor failure, or restrictions |
| UV dye or electronic leak detector | Pinpoints the exact leak location along hoses, fittings, and seals |
| Voltage check at the clutch | Confirms electrical power is reaching the compressor when commanded |
| Condenser fan current/relay test | Verifies the fan is drawing correct current and cycling on command |
| HVAC actuator scan test | Diagnoses blend door and control module faults through the vehicle's computer |
A gauge set gives real diagnostic signatures: low pressure on both sides usually means a low charge or leak, pressures that equalize in the mid-range often point to a failed compressor, and high-side-high/low-side-low readings suggest a restriction at the expansion device or a condenser airflow problem. A rapidly cycling clutch is another tell, since it commonly means the system is protecting itself from running on low refrigerant pressure.
Pro Tip: A successful repair should hold stable vent temperatures and correct gauge pressures through a full road test, not just a cold blast in the driveway.
When should you DIY versus call a technician?

Some jobs are genuinely safe to handle yourself. Cabin filter swaps, clearing leaves and bugs from the condenser, and checking fuses and relays cost little and carry no risk.
Refrigerant handling is a different story entirely. Leak repairs, compressor replacement, and system flushing require recovery equipment and, in most jurisdictions, certification to legally handle refrigerant. Skipping that isn't just a legal grey area, it risks releasing refrigerant into the atmosphere.
- Avoid DIY recharge cans and stop-leak products. They commonly cause further problems, including contamination and incorrect charge levels that make a proper shop repair harder and more expensive later.
- Compressor replacement after internal failure usually requires flushing the lines and replacing the receiver/drier and expansion device too, since leftover debris can kill a new compressor within days.
- Expect a simple leak repair and recharge to run from a modest same-day job to a multi-day repair if a compressor or condenser needs replacing, depending on parts availability and labour at your local shop.
Preventive maintenance to keep your AC cold
A little upkeep prevents most of the failures above. Swap the cabin air filter on your manufacturer's schedule, and sooner if you've driven through wildfire smoke or heavy dust. Rinse debris out of the condenser fins gently with low-pressure water, never a pressure washer that can bend them.
- Run the AC for a few minutes even in the coldest months. It circulates compressor oil and can surface a slow leak before summer heat makes it obvious.
- Book an annual inspection and insist on certified refrigerant handling, never a shop that just tops off a can without checking for leaks first.
Pro Tip: Ask any shop upfront whether they perform a leak test before recharging. Recharging a leaking system without finding the leak just delays the same repair by a few months.
What does the evidence actually tell you to do first?
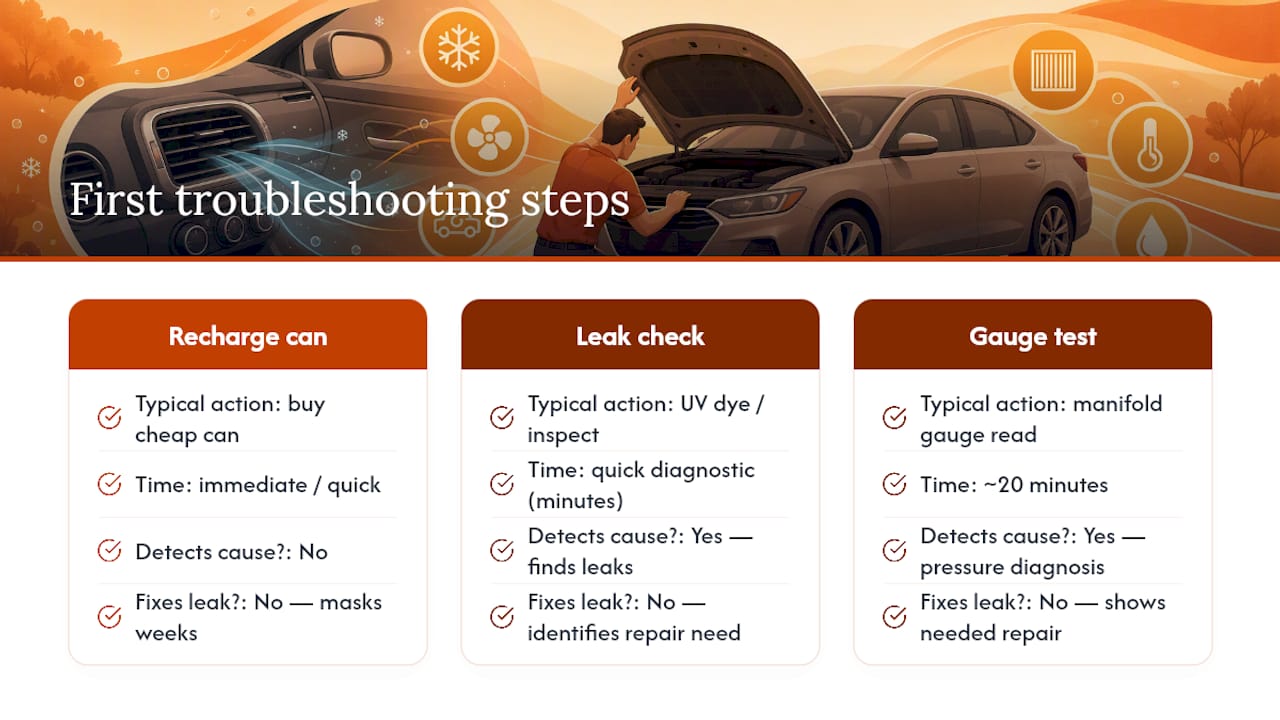
Most car owners chase the wrong fix first. They buy a recharge can because it's cheap and available at any parts store, when the actual problem is almost always a leak that a can of refrigerant does nothing to repair. It just masks the symptom for a few weeks.
The conventional advice to "just get it recharged" skips the diagnostic step that actually matters: finding out why the refrigerant left in the first place. A manifold gauge test and a UV dye check take a technician maybe twenty minutes, and they tell you whether you're looking at a $150 O-ring or a $1,500 compressor job. Skipping that step to save time almost always costs more later.
What should you prioritize first? The free stuff. Check your settings, pull the cabin filter, and look at the condenser fins before you assume the worst. If those checks come back clean and the compressor clutch isn't engaging, that's your signal to stop diagnosing in the driveway and get a certified technician on gauges. Guessing past that point wastes money faster than any of it should.
— Andrii
Why use GarageMap to find a certified AC repair shop
Garagemap is the faster way to get a real diagnosis instead of gambling on a recharge can. Rather than calling shop after shop to ask who actually handles refrigerant work, you compare vetted local providers side by side and see exactly who offers AC diagnostics and certified service.

When you're booking, look for a shop with certified refrigerant handling, a manifold gauge and leak-detection setup on hand, and a warranty on parts and labour. Garagemap's AC repair listings let you filter for exactly those shops instead of sifting through generic listings that don't specify what equipment a shop actually has. If you're in the Calgary area, you can also browse local shops near you to find one that fits your schedule and budget. Find your shop, book the diagnostic, and get back to driving with cold air.
Sources
- Troubleshooting common car AC issues | Toyota
- Troubleshooting car AC problems | AutoZone DIY
- Car maintenance: car air conditioner | CARFAX