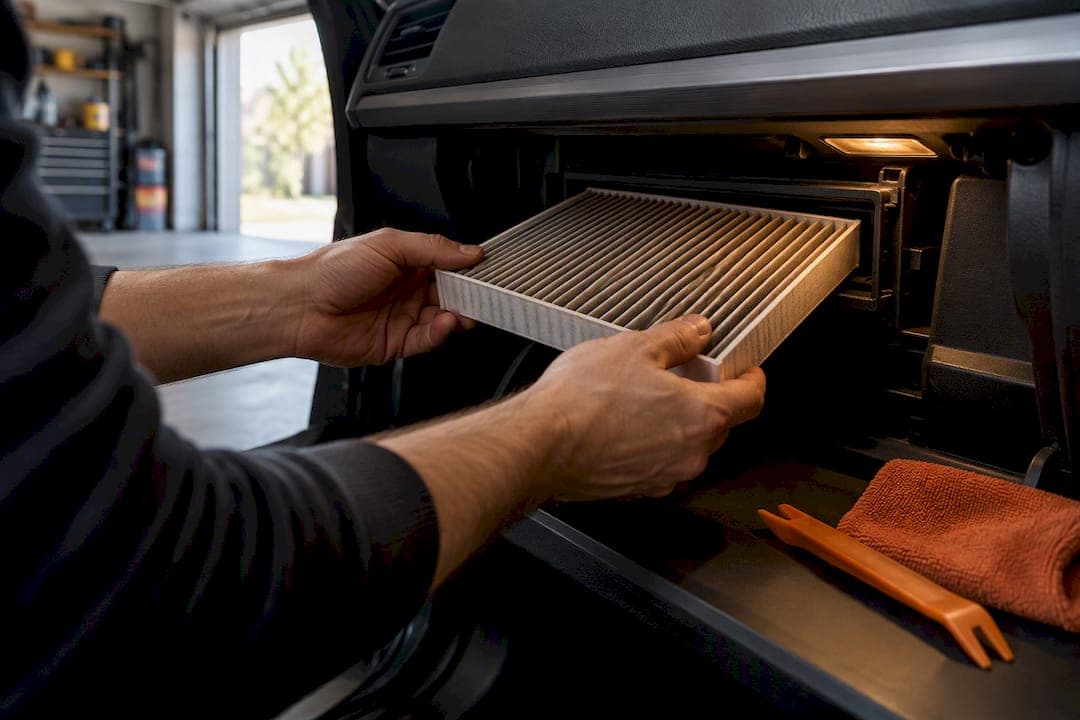
Yes, most drivers can check and replace their own cabin air filter in under 30 minutes, and it typically pays off right away. Airflow gets stronger, musty odours fade, and the windshield defrosts faster on damp mornings. Most vehicles hide this filter right behind the glovebox, no special tools needed. Skip the DIY route only if yours sits under the dash or behind the cowl, if you spot mould or standing water, or if you'd simply rather have a professional confirm the job.
TL;DR:
- Most cabin air filters can be replaced easily in under 30 minutes, especially if they are accessible behind the glovebox, without tools.
- Replacement should occur roughly every 12,000 to 15,000 miles or annually, but more frequent changes are advised in dusty, smoky, or allergy-prone environments.
- Signs of a clogged filter include weak airflow, increased odours, and slower defrosting, with patchy light transmission in the old filter confirming the need for replacement.
- Incorrect installation, such as fitting the filter backward or not sealing the housing properly, is the most common cause of post-replacement issues like noise or poor performance.
- For difficult setups or signs of mold or standing water, professional servicing is preferable, and vetted shops can confirm the HVAC's condition or handle complex replacements.
Table of Contents
- What does a cabin air filter actually do?
- When should you actually replace it?
- What tools do you actually need?
- How do you replace a cabin air filter step by step?
- How do you know the replacement actually worked?
- How do you pick the right replacement filter?
- What are the most common mistakes people make?
- Why trust this guide, and what if you'd rather skip the DIY route?
- Should you DIY this or book a shop?
- Prefer a pro to handle it? Here's the faster route
- Sources
- FAQ
What does a cabin air filter actually do?
Every bit of air that comes through your dash vents passes through this filter first. It's designed to trap dust, pollen, mould spores, smoke particles, and the fine grit that kicks up off the road, so what actually reaches your face is cleaner than what's outside the car.
Once that filter clogs, the whole HVAC system feels it:
- Vent airflow weakens noticeably, even on the highest fan setting
- Odours get worse instead of better, especially with the AC running
- Defrosting slows down because less air is moving through the vents
Activated-charcoal filters go a step further, pulling in some gases and odour compounds that a plain pleated filter lets straight through.
When should you actually replace it?
The general rule most manufacturers land on is roughly 12,000 to 15,000 miles, or 20,000 to 25,000 kilometres, or once a year, whichever comes first. Your owner's manual has the final word here, since some automakers push that interval longer or shorter depending on the cabin filter design.
Mileage isn't the whole story. A filter that's barely driven can still pick up moisture and organic debris just sitting in a humid garage, which is why annual replacement often beats a pure mileage countdown for low-mileage drivers.
Statistic to remember: Cars.com pegs the standard interval at 12,000 to 15,000 miles, but several conditions shrink that window:
- Long drives on dusty gravel or rural roads
- Extended exposure to wildfire smoke
- A jump in allergy symptoms while driving with windows up
What tools do you actually need?
Good news: most cars need zero tools for this job. A handful of models require a Phillips screwdriver or a small plastic trim tool to release the housing clips.
- Grab a flashlight, a rag, and either a small vacuum or a can of compressed air
- Pull up your owner's manual or a model-specific video for your exact vehicle, since housing designs vary more than people expect
- Snap a quick photo of the filter's orientation and the housing itself before you touch anything
Pro Tip: Take that "before" photo even if you're confident. It takes five seconds and it's the fastest way to avoid guessing which way the airflow arrow should point when you're reassembling everything in a cramped footwell.
How do you replace a cabin air filter step by step?
Here's the sequence that covers the vast majority of vehicles on the road, based on the standard glovebox-access method.
- Empty the glovebox completely, then locate the stops or damper arm on each side that limit how far it swings open.
- Release those stops (usually a gentle squeeze or a small tab) and let the glovebox drop down fully. This exposes the filter housing directly behind it on most sedans, crossovers, and SUVs.
- Open the housing cover. Some pop off with tabs, others need a couple of screws removed. Either way, take your photo now if you haven't already.
- Slide the old filter out and hold it up before tossing it aside. This is your chance to actually see what's been living in your vents.
- Clean the housing tray with a rag or a quick pass of the vacuum. Leaves, seed pods, and road grit collect in there more often than most owners expect, and a dirty tray shortens the life of the new filter.
- Check the airflow arrow printed on the filter frame or housing. It has to point toward the blower motor, not toward the cabin. Installing it backward cuts filtration efficiency and often adds fan noise you didn't have before.
- Slide the new filter in so it seats flush against the housing walls. If it's binding or leaving a visible gap on one side, stop. Something's off, either the wrong part number or a filter that's not folded correctly.
- Close the housing cover and snap the glovebox back into place, making sure both stops re-engage.
- Start the car and cycle the blower through every fan speed, testing both fresh-air and recirculate modes. Airflow should feel noticeably stronger than it did before you started, and you shouldn't hear any new whistling or rattling.
On a small number of vehicles, that filter sits under the hood near the base of the windshield instead, or there are two filters rather than one. Check your manual first if the glovebox method doesn't turn up a housing.
One number worth keeping in mind: the entire job, start to finish, usually runs 10 to 30 minutes once you know where the housing is.
How do you know the replacement actually worked?
Run the blower test again, deliberately this time. Airflow should feel consistently stronger across every fan speed, on both fresh-air and recirculate settings.
A few other quick checks:
- Any new whistling almost always means the housing cover isn't fully seated, not a defective filter
- Hold the old filter up to a light source: even light through the pleats means it was fine, patchy dark spots confirm it was overdue
- Lingering odour after the swap can point to mould already growing inside the housing or ductwork, not the filter itself
Pro Tip: If you still smell something musty a day or two after the change, it's worth running the AC on max for ten minutes with the windows down. That sometimes clears residual mould spores that settled during the old filter's last few weeks in service.
How do you pick the right replacement filter?
Match the filter to your specific make, model, and year using your VIN or a proper parts lookup, rather than trusting a generic size sticker on the shelf. Fit and material quality vary more between filters than most drivers assume, and a filter that's a few millimetres off leaves gaps air can bypass entirely.
Three basic types show up in most parts aisles:
- Pleated paper filters handle dust and debris well and cost the least
- Electrostatic filters add a charge that helps trap finer particles
- Activated-charcoal filters add odour and light gas filtration on top of standard filtration
Test-fit the new filter before you snap the housing cover shut. If it binds, warps, or leaves a visible gap along one edge, it's the wrong part, and returning it now saves you from redoing this whole job in a week.
What are the most common mistakes people make?
A few small errors account for most of the redo jobs and comeback complaints:
- Backward installation: the arrow needs to point toward the blower motor, not away from it
- Loose housing cover: this is the single most common cause of a new whistling or rattling sound after a swap
- Forcing a bad fit: if a filter doesn't slide in cleanly, check the part number again rather than jamming it into place
Why trust this guide, and what if you'd rather skip the DIY route?
This guide follows the same access method and orientation checks documented in Autocare's technical bulletins on cabin filter servicing and HVAC performance. If your filter turns out to be buried under the dash, you find mould or standing water in the housing, or you'd rather have someone else confirm the fix, GarageMap connects you with vetted automotive shops across Alberta, helping you find the right technician fast.
— Andrii
Should you DIY this or book a shop?
DIY makes sense when access is simple and there's no visible moisture or mould. Book a shop instead if the filter's hard to reach, you spot standing water, or a loose housing hints at a bigger HVAC issue worth a second opinion.
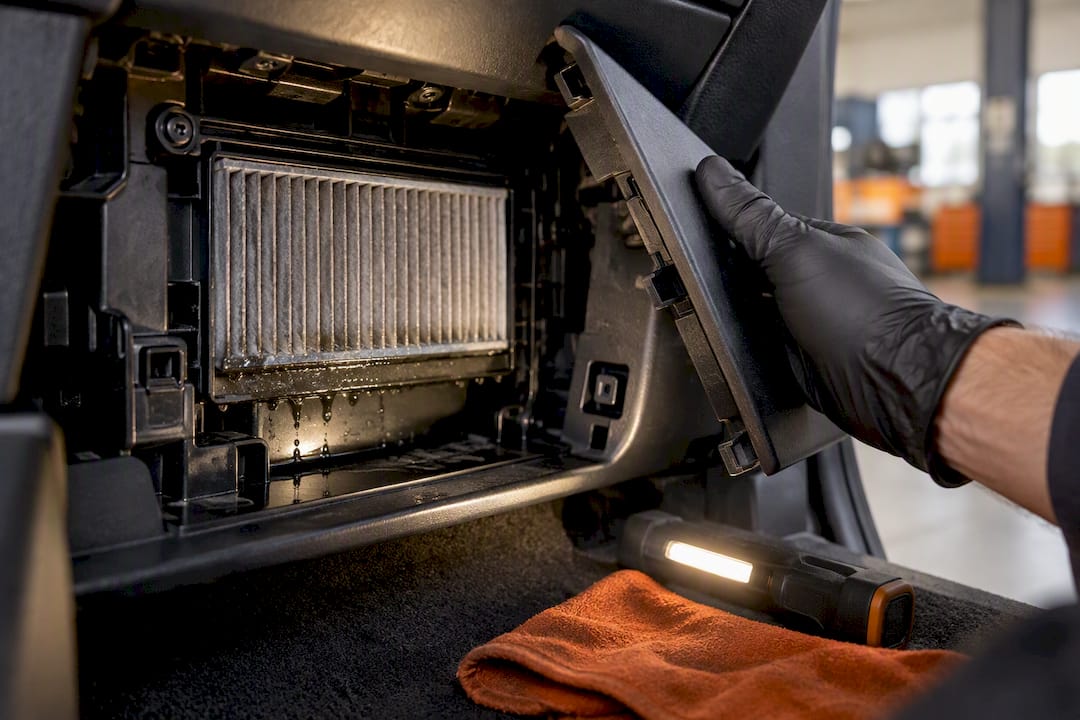
Prefer a pro to handle it? Here's the faster route
Not every vehicle makes this an easy 15 minute job, and not every driver wants to spend a Saturday afternoon under the dash. If your filter housing is buried somewhere awkward, or you'd rather have a technician confirm there's no mould hiding in the ductwork, GarageMap is built to skip the guesswork of calling around Calgary, Airdrie, Chestermere, or Okotoks one shop at a time.

GarageMap's search lets you filter by exactly the service you need instead of scrolling through unrelated listings, comparing vetted local shops side by side so you land on real quotes from actual garages rather than a generic estimate. If the swap uncovers a bigger HVAC problem, whistling that won't quit, persistent odour, or a fogging windshield that won't clear, you can go straight to a car AC repair specialist or book a general vehicle inspection and maintenance check through the same search. Head to GarageMap to compare shops near you and get a quote before you commit to anything.
Sources
Check your owner's manual for exact intervals, and lean on model-specific DIY guides or technical service bulletins for HVAC servicing notes.
- The importance of servicing cabin air filters (Autocare technical bulletin)
- How to replace your cabin filter (iFixit)
- Cars
- How to change your cabin air filter in 10 minutes (NAPA Canada)
FAQ
How often should you change a cabin air filter?
Most manufacturers recommend replacement every 12,000 to 15,000 miles (20,000 to 25,000 kilometres), or once a year, whichever comes first. Dusty driving conditions, wildfire smoke, or rising allergy symptoms all justify swapping it sooner.
Can I replace the cabin air filter myself?
Yes, most vehicles allow a straightforward DIY swap behind the glovebox using nothing more than your hands, or occasionally a screwdriver. If yours sits under the dash or you find mould inside the housing, a technician found through GarageMap can handle it instead.
What are the symptoms of a dirty cabin filter?
The clearest signs are weak airflow from the vents, persistent bad odours, and windshield fogging that's slow to clear on defrost. Holding the old filter up to light and seeing patchy, blocked pleats confirms it was overdue.
What happens if you don't change your cabin air filter?
Airflow keeps weakening, odours build up, and in extreme cases, a heavily clogged filter can let debris reach the evaporator core, affecting the HVAC system's longevity. It also makes windshield fogging worse, since less clean air is reaching the defrost vents.